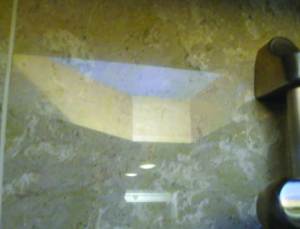
Caring for your Marble Showers
This evening I met with a client that had a beautiful marble shower. It was only two years old though and had signs of soap scum and minerals on the surface but overall it was in good shape. I explained to my customer that it was too soon to need professional help but we settled on a price to restore the surface so she could start fresh with the correct maintenance procedures and hopefully get many years of life before needing my services again. After we complete the service her marble will never look so good!
When caring for your marble shower it is important to remember a few simple rules.
- Water is the enemy of marble, especially polished marble. Water carries soap and other particulates into the stone and dries leaving them behind to become soap scum. The resulting moisture left behind by water can allow mold and mildew to grow on the surface and weaken the sealer.
- Bar soaps cost you money, and lots of it. When you use bar soap in your marble shower you are converting a solid to a liquid during your scrubbing then allowing it to convert back again to a solid on your shower walls. Using bar soap without removal, after your shower, will hasten the need for professional services.
- Squeegees save you money. After each shower, you should squeegee the walls and glass. This practice will prevent nasty hard water stains from occurring over time and will save you money by reducing the need for professional services.
Tools to have on hand (Always have a squeegee on hand for daily squeegeeing):
- Nylon Handle Brush
- Small nylon grout brush
- EasyOxy
- MB3 Soap Film Remover
- MB9 Mildew Remover
- StoneScrub
- Diluted Bleach – 4oz to a 32oz squirt bottle of water (not for polished surfaces)
- Microfiber towels
- Appropriate Safety Gear
Evaluate Surfaces to begin maintenance:
- Check all grout areas especially in areas subject to intense exposure to water. The perimeter grout should be intact. If you have gaps or missing grout repair it as soon as possible to avoid water damage. Allow grout repaired areas to cure for a minimum of 7 days (optimum 14) prior to use.
- Look closely at the surface for water absorption. If you have dark tiles that once were light, especially in high water exposure areas, it is time to apply a sealer. It is best to allow drying time before sealing. Drying can be help along with heating and dehumidifying methods. (Allow sealed areas to cure for a minimum of 2 days (Optimum 5) prior to use.
- Evaluate the surface for mold or mildew. Mold and Mildew is not always visible so look carefully. Although some showers may need more frequent treatment, most showers will need a biyearly treatment to keep your shower mold free.
Daily Maintenance:
- Squeegee walls and glass after each shower.
- Dry corners and edges to remove water. This will help prevent mold.
- Leave the shower door open and if possible and window open to allow the surface to dry.
Weekly or Biweekly Maintenance:
- Spray the each wall with EasyOxy as necessary and buff clean with Microfiber cloth.
- Use EasyOxy on soap dish, shower seat, and any other horizontal surface. It may be necessary to allow a few minutes dwell time to break down soap scum if you have not yet made the transmission to liquid soap.
- Use EasyOxy on the glass and metal with a clean microfiber. If your glass has been treated with Wipe NSeal you should not have any mineral deposits to remove. Mineral deposits can be removed by rubbing liberally with StoneScrub. StoneScrub Residue can be removed with EasyOxy.
Biyearly or Every Six Months:
- Use MB3 Soap Film Remover to insure that you have fully removed soap scum. If you have made the transmission to liquid soap and have been squeegeeing the walls religiously, this step will be very easy or possibly unnecessary.
- Use MB9 Mildew Remover to kill and remove any living mold or mildew. If you have been using EasyOxy Cleaner on your weekly or biweekly cleaning, have been squeegeeing the walls religiously, and have completed the previous step, this step will be very easy or possibly unnecessary.
- Check all grout areas especially in areas subject to intense exposure to water. The perimeter grout should be intact. If you have gaps or missing grout repair it as soon as possible to avoid water damage. Allow grout repaired areas to cure for a minimum of 7 days (optimum 14) prior to use.
- Look closely at the surface for water absorption. If you have dark tiles that once were light, especially in high water exposure areas, it is time to apply a sealer. It is best to allow drying time before sealing. Drying can be help along with heating and dehumidifying methods. (Allow sealed areas to cure for a minimum of 2 days (Optimum 5) prior to use.
About Ted McFadden: Ted is the owner of Sureshine Care and Restoration Services, Inc. in Orange County California with an office in Morgan Hill, California. Ted has been polishing and restoring natural stone and tile since 1987, has written a book on the subject and teaches a four day intensive hands on seminar to teach interested students the stone restoration trade. If you are in need of services in Southern California, please call us at (800)378-0266 or emailinfo@sureshinecares.com. You can purchase all of the products listed in this article ateasystonecare.com.
Comments
Leave a Reply
You must be logged in to post a comment.

Be the first to comment.